

Watch Cases
Posted on 11th November 2021 at 20:58
I’m going to describe an up-coming project so that I can blog about the design and commissioning process.
The client is a good friend of mine, but it is none-the-less a genuine project that needs to be…
1. fit for purpose
2. aesthetically pleasing
3. within a budget (yet to be decided).
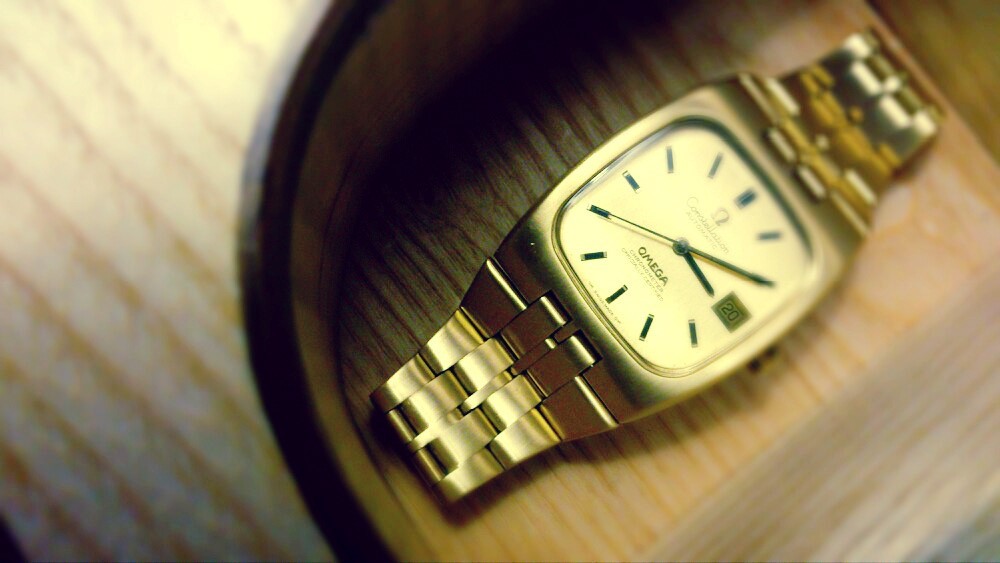
Mark collects a specific type of Omega ‘Constellation’ watch and would like me to make a box to keep them in. I thought I’d start by looking at the design features of this type of watch. They all have a distinctive square/round face, and the metal wrist band is integrated into the watch itself.
Here’s an example of one…
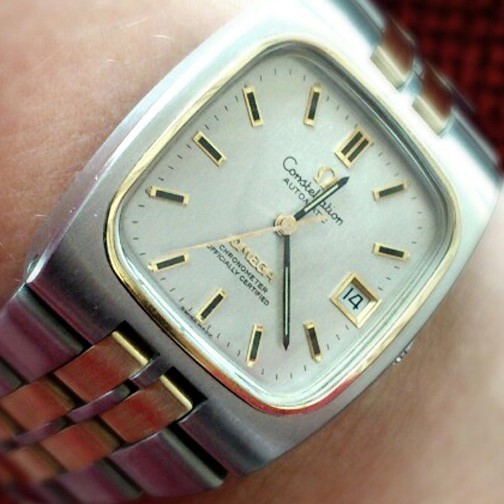
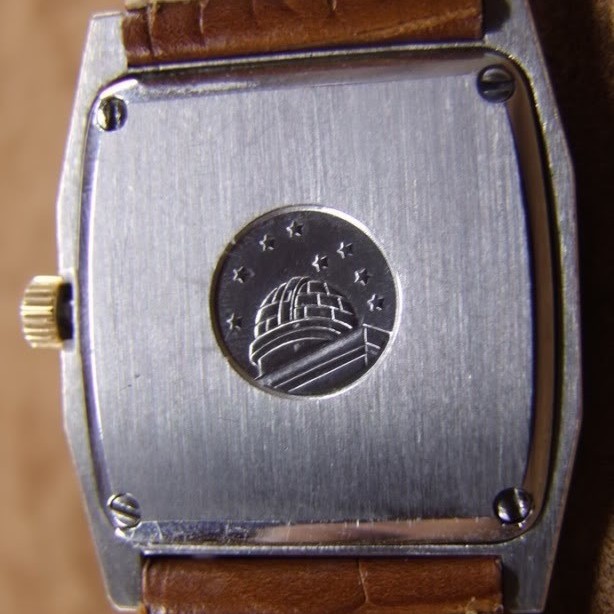
There is also the Omega Ω symbol. Another design feature is etched into the back…
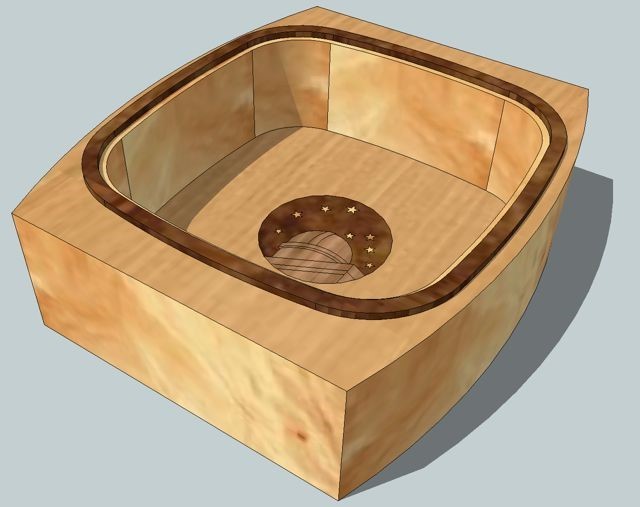
With all this in mind, here is a sketch of my initial idea…
I’ve copied and pasted the emails we sent to each other below.
Hi Mark
What do you think to this? No idea how your watches would sit inside yet, but just getting the ball rolling…
Love this, Dan!
The shape is fantastic and I really like the dark detailing of the rounded square, the classic light burl wood and the constellation logo is a brilliant idea.
I think internally it will have to include the traditionally compartments and cushions, simply to keep the watches from dinging and scratching each other.
I think the logo would look brilliant on a lid. On top or maybe as you open it on the upper inside?
Again the overall shape really works for me and is something I’ve not seen before. I like the chunky look.
What are your thoughts?
I’ll keep our progress updated on this blog. I hope it will be an interesting example of what goes into a piece of work before the actual making starts.
Love this, Dan!
The shape is fantastic and I really like the dark detailing of the rounded square, the classic light burl wood and the constellation logo is a brilliant idea.
I think internally it will have to include the traditionally compartments and cushions, simply to keep the watches from dinging and scratching each other.
I think the logo would look brilliant on a lid. On top or maybe as you open it on the upper inside?
Again the overall shape really works for me and is something I’ve not seen before. I like the chunky look.
What are your thoughts?
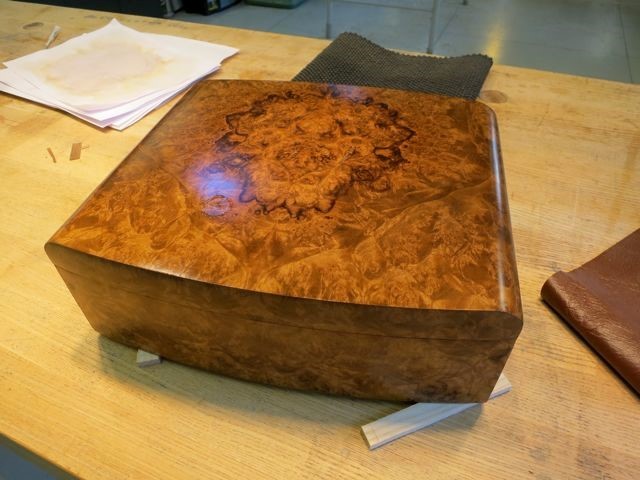
I’m making a prototype of a case I’ve designed to hold 6 Omega watches. There are a few ways I could go about making this, but I’ve decided to make it out of MDF and then veneer over all the surfaces. This is so I can use a burr veneer, which would be very expensive to make from a solid block.
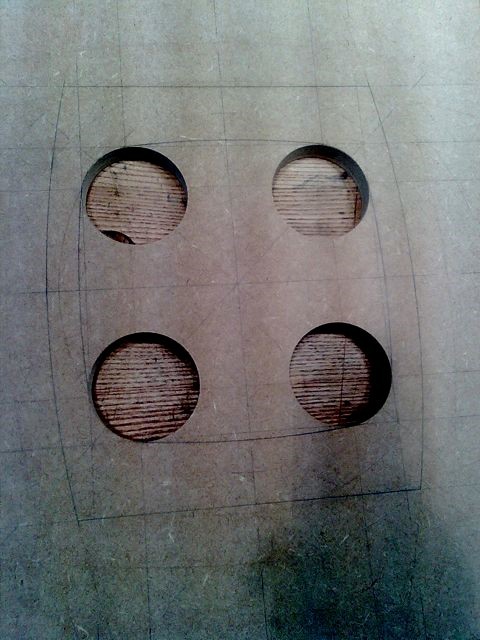
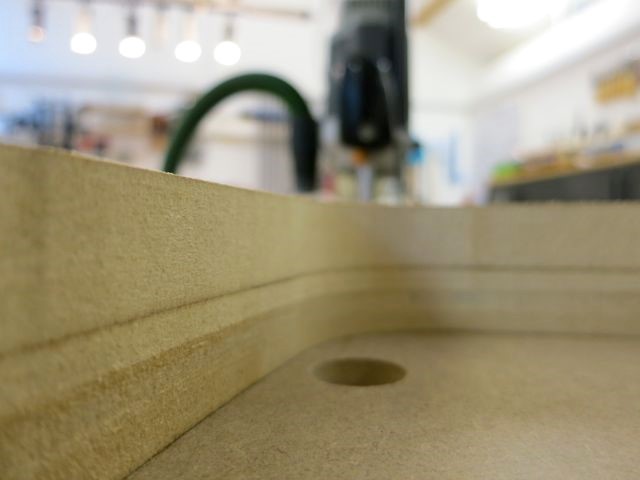
The first step was to draw a template on a piece of 18mm thick MDF. The curves at the corners have a radius of 35mm, and the curves that join them up at a tangent have a radius of 615mm. Here you can see that I’ve cut the corner curves with a large ‘forstner’ drill bit.
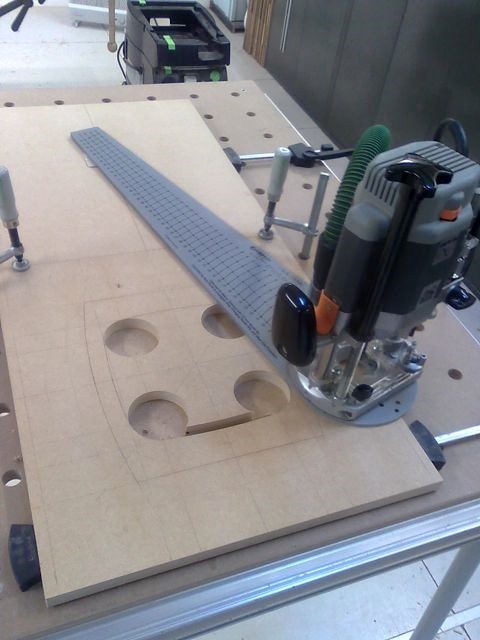
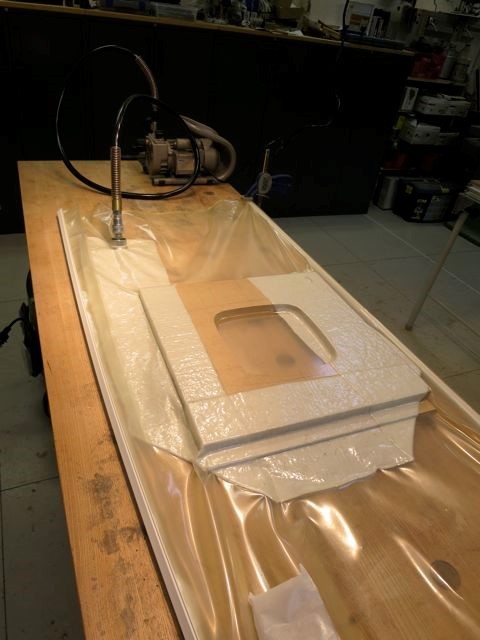
I cut the other curves using a router attached to a trammel. After a bit of tidying the curves up with a sanding bobbin, I cut out a rough shape of the next layer with a jigsaw. I glued the two layers together by clamping them in the vacuum bag press. The bag press is great for giving a strong, even pressure across a large surface area.
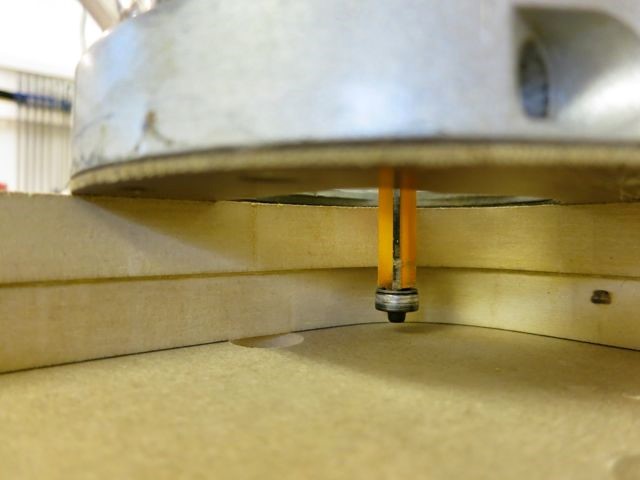
The next job was to trim the roughly-cut second layer to exactly follow the curves of the first. The ideal way to do this was to use a bearing guided router bit.
The cutter is exactly the same diameter as the bearing guide on the end, so the cut of the second layer will follow the guide which is set to the first layer.
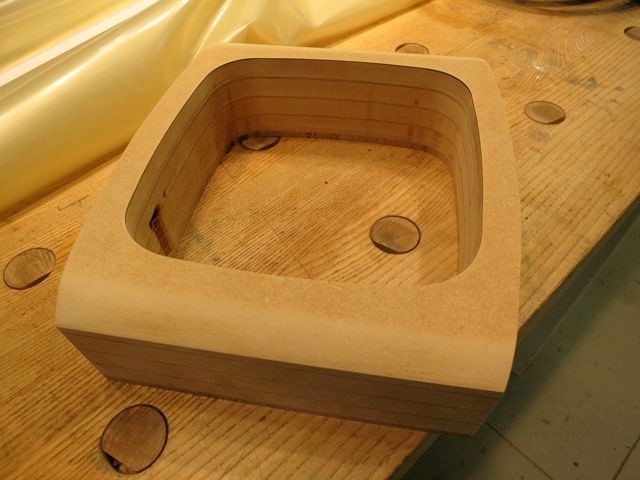
After glueing up a few more layers, each using the previous layer as a template, I cut the outside curves on the bandsaw. The next step is to attach the veneer…
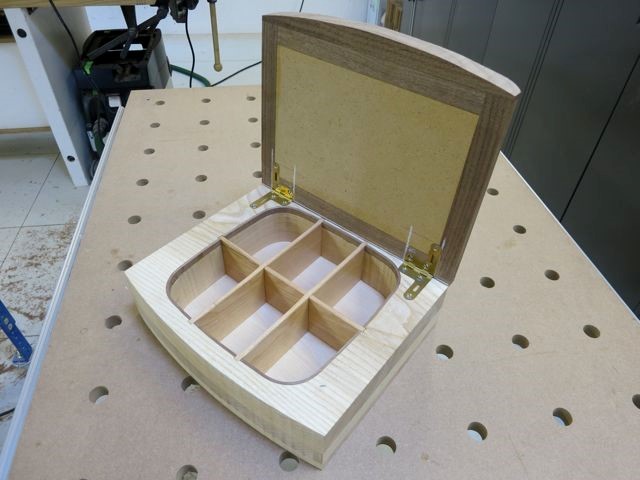
I’ve made a new carcass out of solid ash rather than MDF. I’m still going to veneer over it, but it made sense to use solid wood as a base as it will make the hinges a bit simpler to fit.
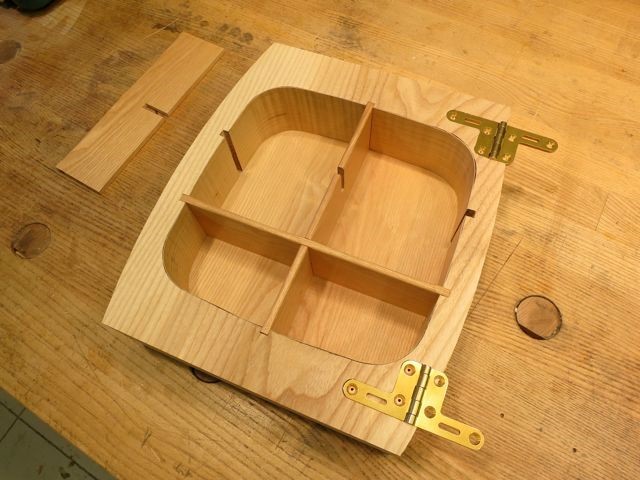
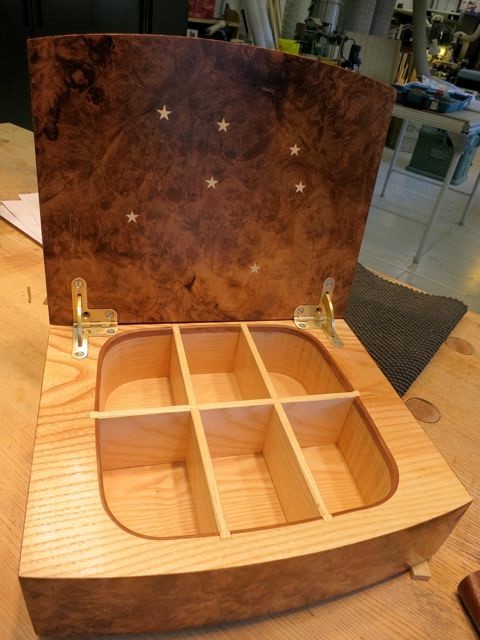
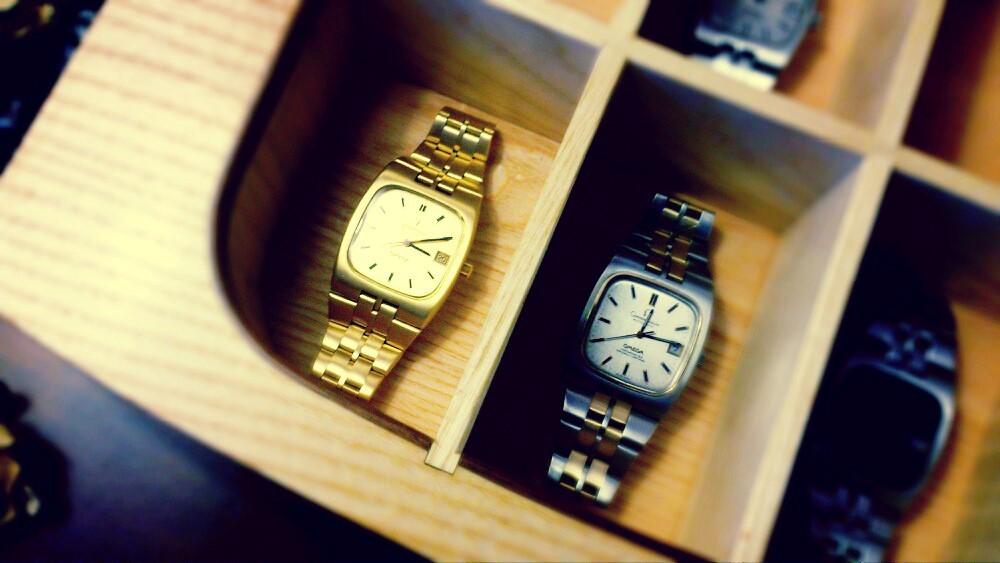
You can see that I’ve made some inserts to split the case into different compartments for each watch. The hinges are high quality quadrant hinges. I still need to cut a deep mortice into the ash carcass to house the arc stay when the lid is closed. You can just see the stays in place.
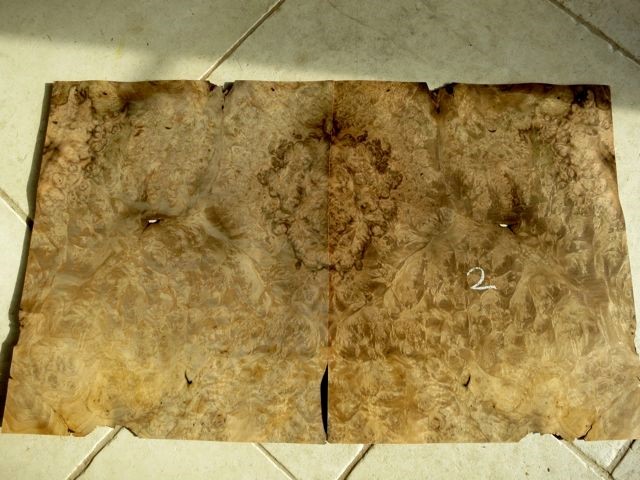
The next step will be to veneer the case with this lush english walnut burr.
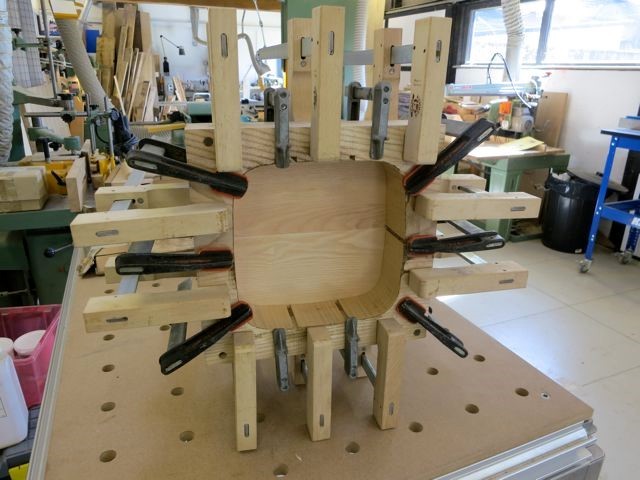
I decided to use cramps to hold the base of the box whilst the glue was setting, rather than using the vacuum bag press. This was only really because my bench was covered with bits and pieces, and I didn’t want to spend time clearing it all away and setting up the vacuum pump. Anyway, I came up with this slightly eccentric contraption.
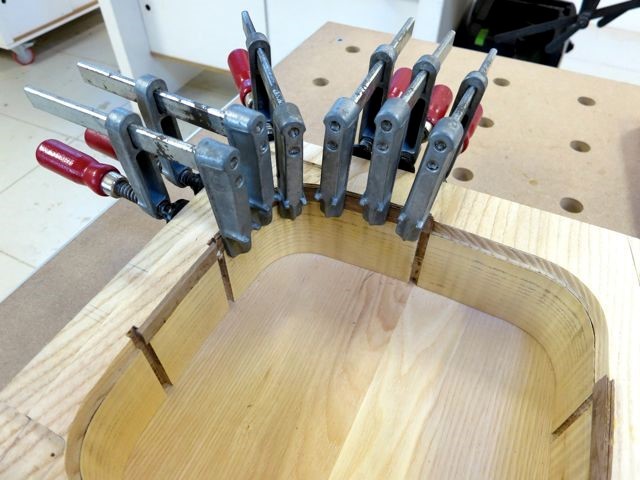
With the base attached I decided to add a small border to the inside curved edge. The pearl glue that I used to attach the ripple ash veneer to the inside is very dark, and left an ugly glue line. I routed around the inside curve to leave a 3mm rebate running around the inside edge. After a bit of experimenting with different thicknesses of walnut border, I sandwiched 7 pieces of walnut veneer and bent them around the curves.
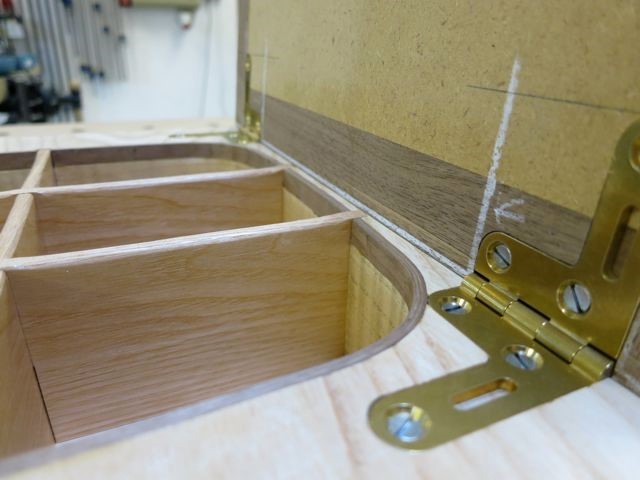
Next was to cut out a recess for the hinges to fit flush in the lid. I agonised with Mark (whose case it will be) over many different methods of hinging. The difficult thing was that he wanted the box to open along the curved edge, and the hinges will only work if the edge is straight. Here’s a photo of the simple solution.
With the hinges accurately attached, the lid moves nicely up and down and has a pleasing weight to it.
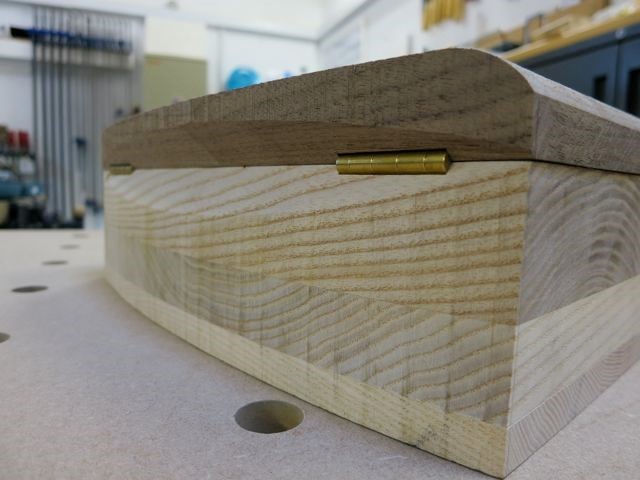
Finally for this post, here’s a detail of the hinges. I alway use steel screws whilst I’m working on a piece, as brass ones can easily shear off as they they go in and out. I’ll replace them with brass ones when it attach the lid for the last time. You can also see the walnut border trimmed flush to the surfaces.
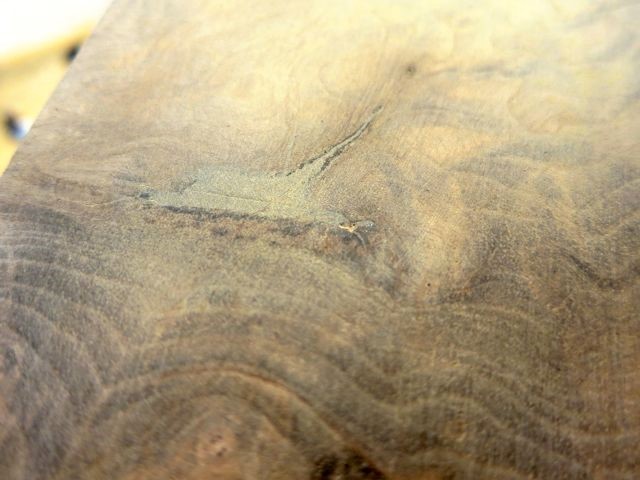
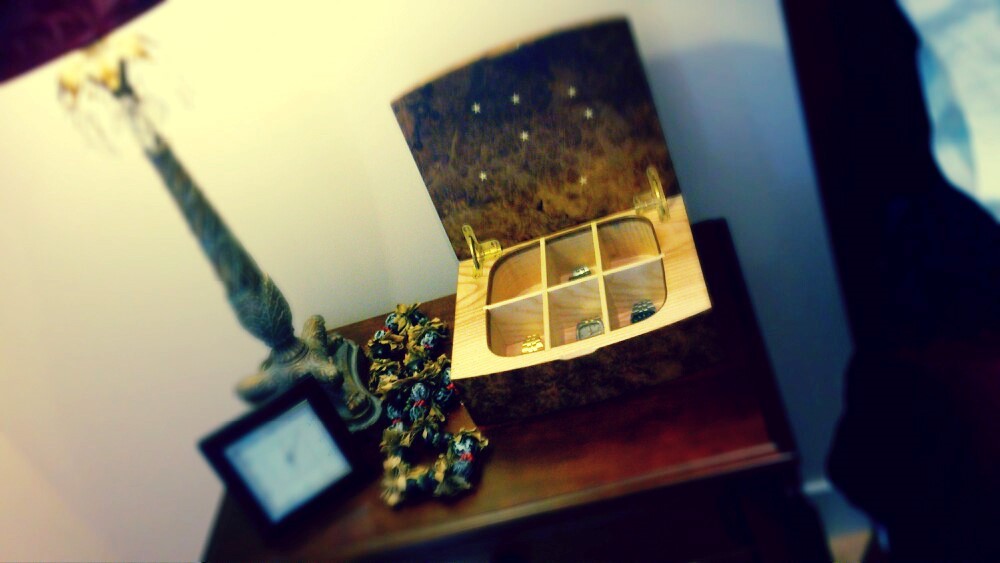
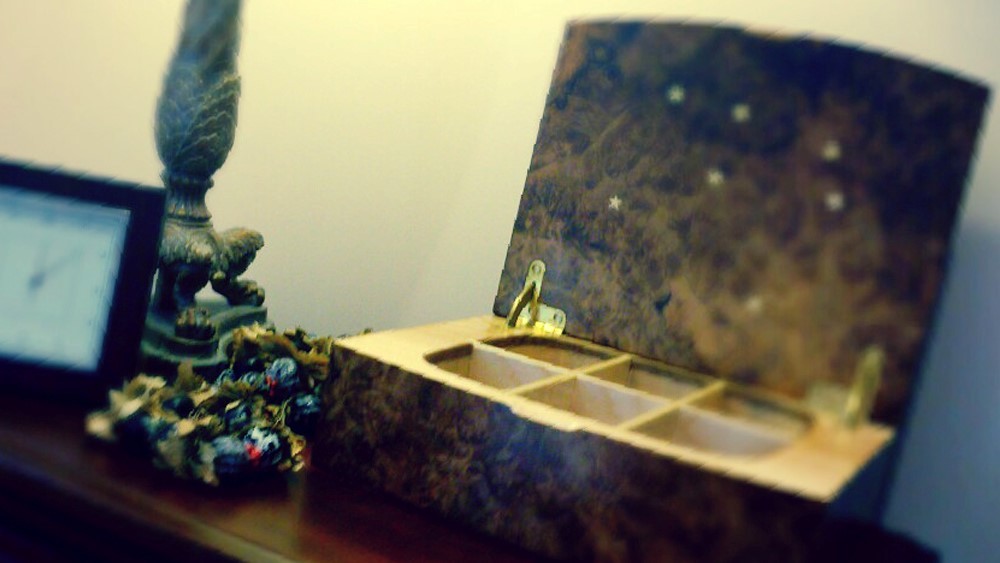
I’ve managed to veneer all the surfaces of the watch case. There were many holes and small nicks in the veneer, some of which I was able to repair with matching veneer pieces. The hole in this photo is a natural hole in the wood, so I chose to fill it with different shades of wax filler.
I simply rubbed the wax filler crayon over the hole until it was completely full. Then I smoothed it off with a cabinet scraper and sand paper.


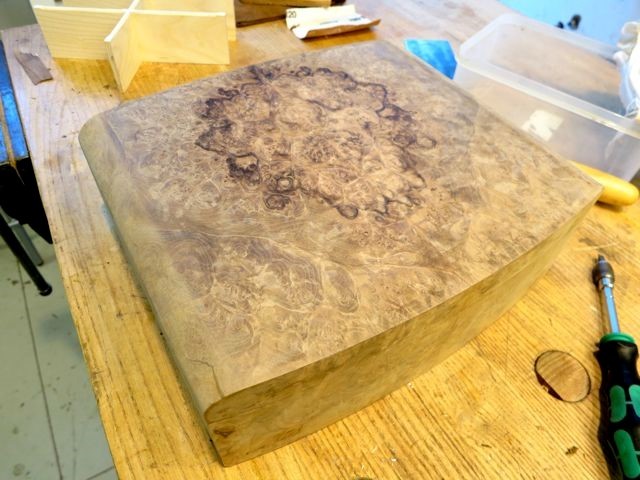
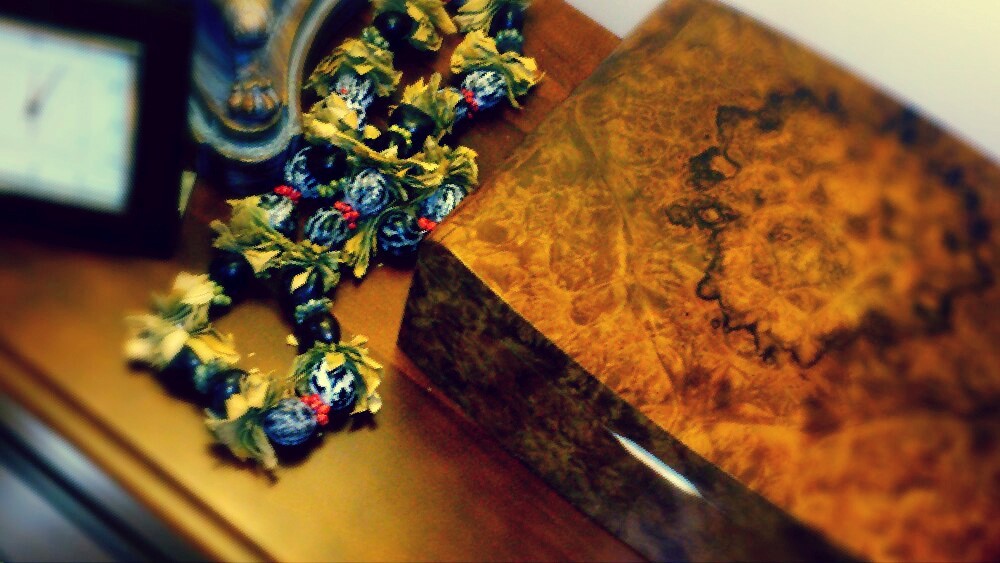
Here’s the outside of the case with all the holes repaired. Not long to go now until the whole box is finished.
I’ve been applying some french polish to the watch case.
I’ve also buffed-up the hinges. Everything is looking nice and silky.

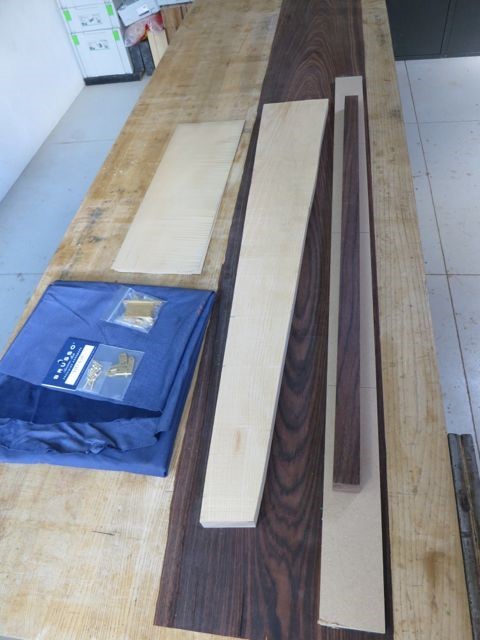
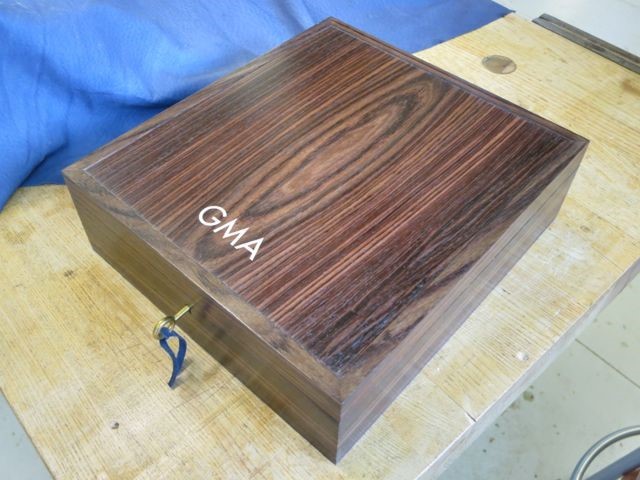
I’ve also designed and made another watch case using indian rosewood, ash and suede, with brass lock and hinges. Here are the raw materials.
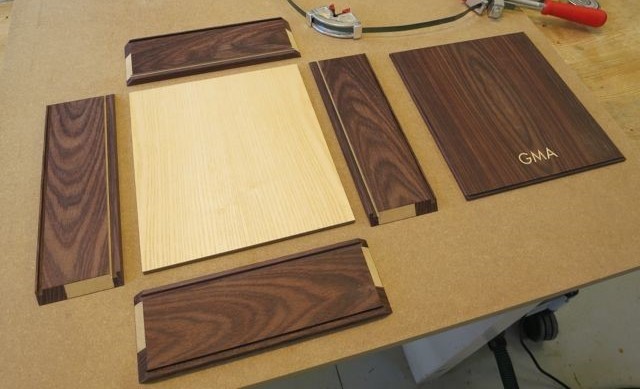
I started by veneering the rosewood and ash onto the base layer of mdf lipped with solid rosewood. I then routed grooves, which will house the base and lid panels. Then I accurately cut the ends of each side panel to a 45 degree mitre.
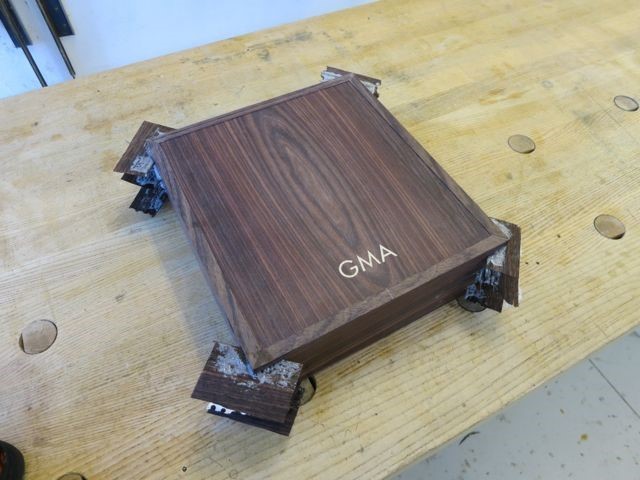
I used a steel band frame clamp to hold the sides in place during the glue-up. The box is glued up as one sealed piece. I cut the lid off on the bandsaw when the glue was dry.
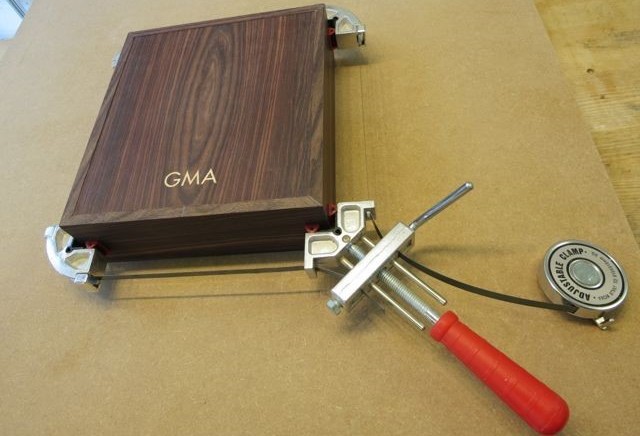
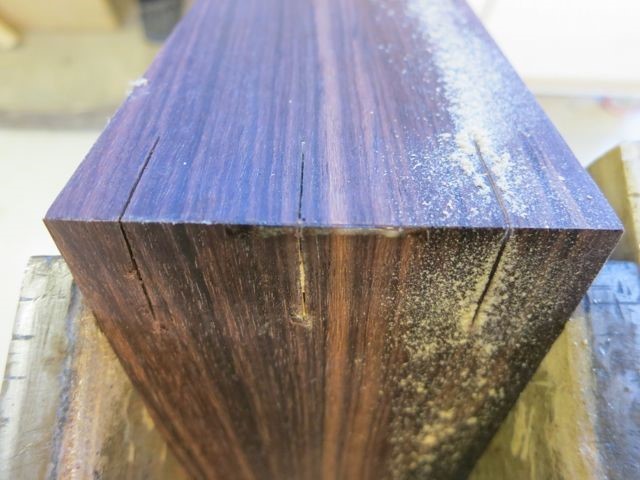
When the glue was set, I used a dovetail saw to cut 3 slots into each corner of the box. Each slot is about 0.6mm thick, which is the thickness of the veneer.
This is so that I could glue keys to strengthen each mitre joint. When I trim them down they will become almost invisible.
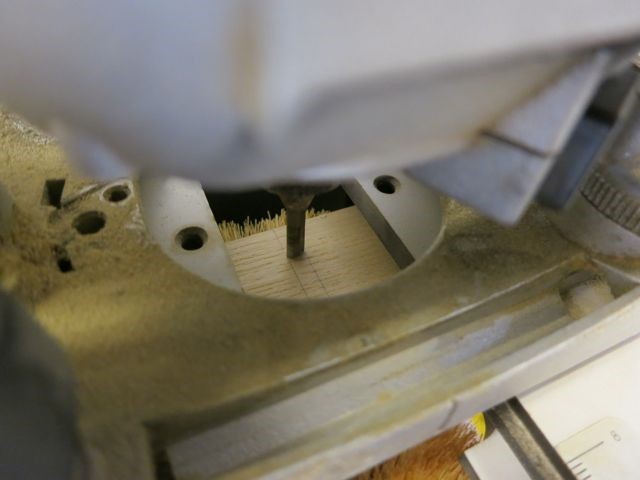
Next I made some 5mm thick inserts from the ash. I used my Woodrat routing jig to cut some 1mm deep slots to create the individual compartments. I find the woodrat jig is particularly good at cutting an accurate groove across the grain.
I marked each slot with a pencil and lined up the cutter by eye.
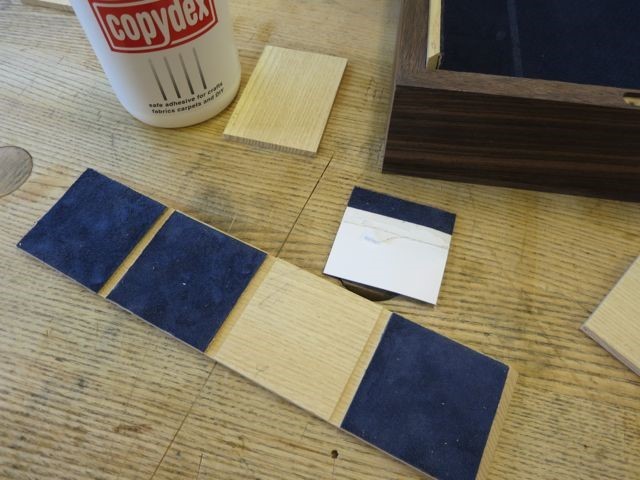
After dry fitting all the ash inserts to make sure everything fitted properly I cut and glued the suede onto each vertical face. I stuck the suede to sticky card to make it easier to fit.

Here’s the box with the hinges and lock fitted. Each compartment will contain a pillow for the watch to be wrapped around.
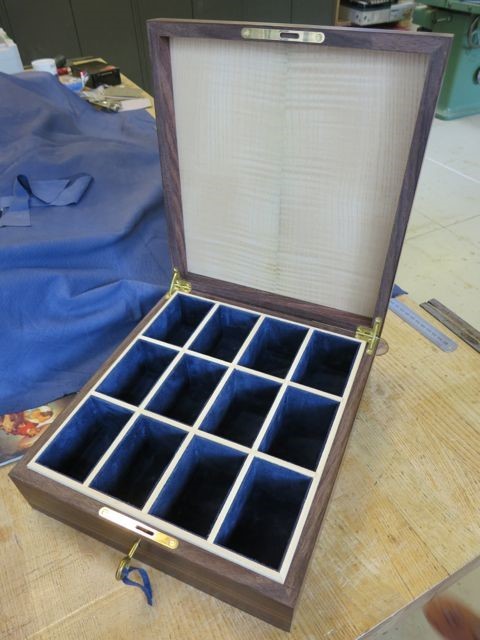
I applied an acrylic finish to the outside, with a wax polish.
Share this post: